

So you’re setting up your store, but you need to know how to add products to Shopify? Well, this is great! A new business is always a reason for celebration, and I’ll tell you exactly how to add products to Shopify and also how to optimize them for search engines.
Besides providing your customers with the needed information on the product, you will need to make sure that they can be found in the search engine’s results.
Let’s go ahead and look at the simple steps you need to go through to add your products to Shopify.
1. Click the ‘Products’ tab
From your Shopify Dashboard, you will need to go ahead and open the ‘Products’ tab. You will be able to see your existing products, if any, or simply a button saying ‘Add product’.

2. Click ‘Add product’
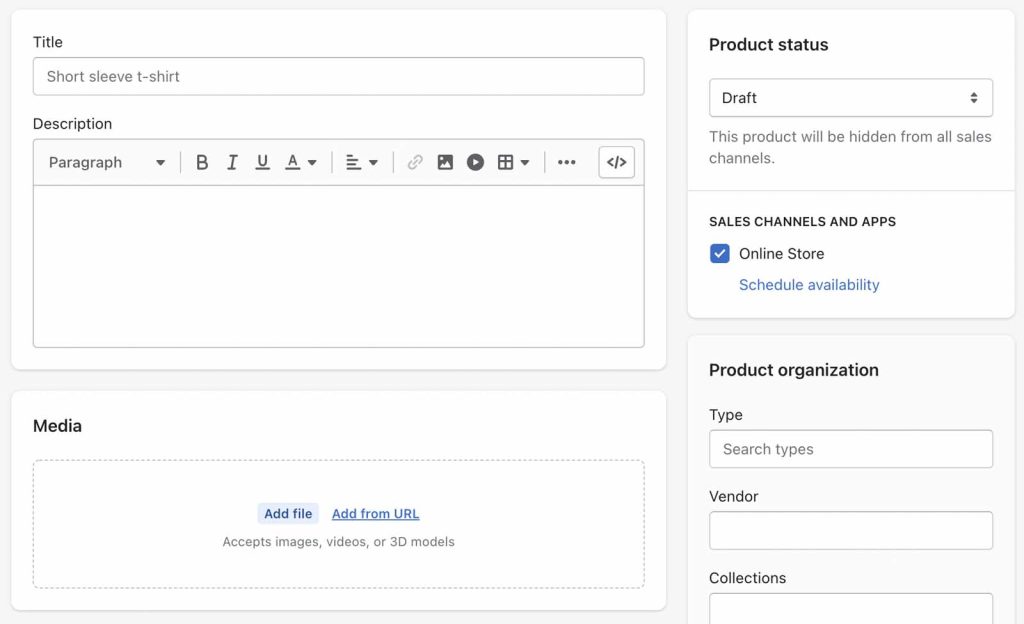
Simply click on the ‘Add product‘ button, and you will open a new page to enter your product information, as well as the sales channels, type of product, vendor, price, inventory, and SEO settings.

3. Fill in your product’s details
Title, description and images
Your products need to have appropriate titles, descriptions, and images to reflect what you’re selling. Everything needs to be descriptive and beautifully structured. In the same step, you need to make sure that the product belongs in the right collection and set the tags right in order to have them structured.
Keep in mind that for SEO purposes, even your file names should be optimised, but you can read more about Shopify image optimization and create an idea.
Pricing
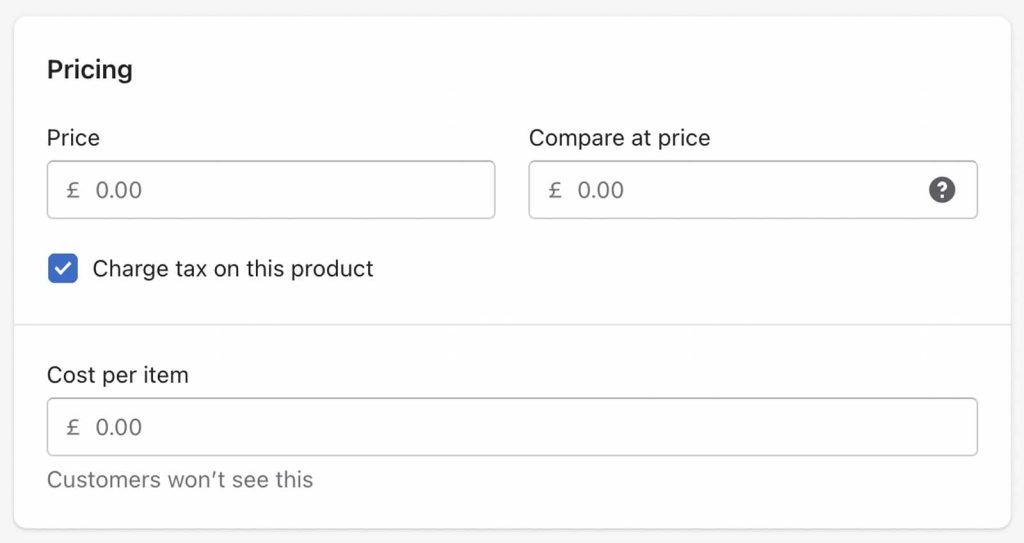
A nice built-in feature Shopify has is the possibility of showing two prices. The first one that’s supposed to be the original price, and the second that’s the discounted price. You can use this either for seasonal sales or simply as a marketing technique to offer a little exclusivity.
If you simply want to choose one price for your product, then just fill out the first box. The “Cost per item” box won’t be visible to the customer but will help Shopify generate complete reports on your sales. Ultimately, you can choose whether to collect a tax on the product or not. Learn more about setting up Shopify tax here.
You can also set a discounted price on your Shopify product by adding your original price in the “Compare-at price” box and then the discounted price in the “Price” box.
Inventory
In the inventory tab, you will need to complete information about the SKU, barcode and general quantity. As they can be a little confusing, especially if it’s your first business, I’ll explain them a little. You can also keep an eye on the inventory adjustment history.
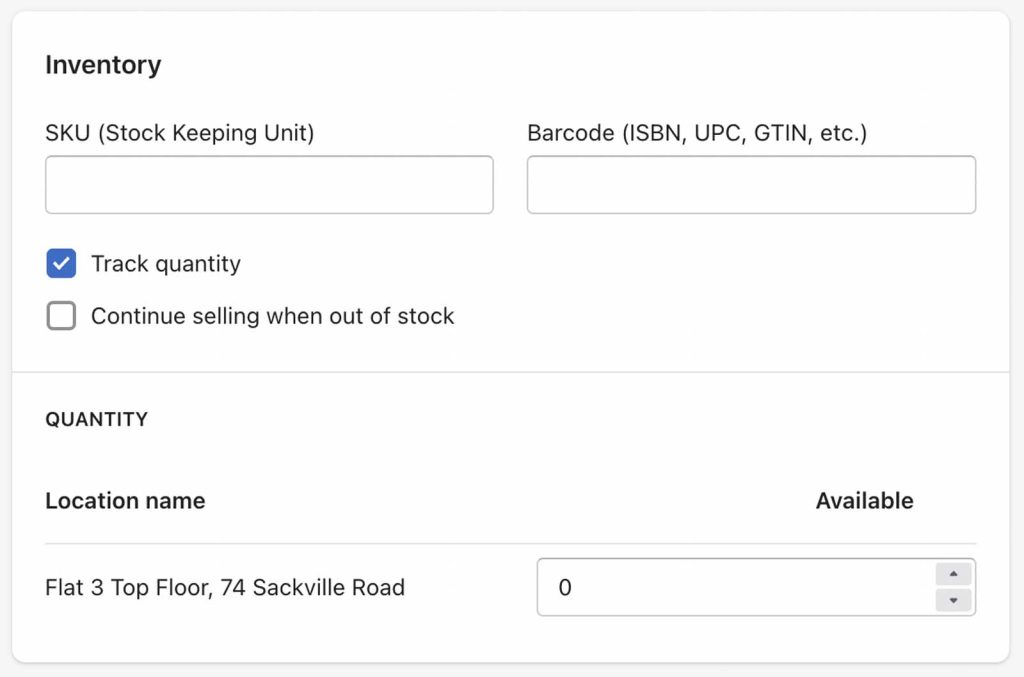
The SKU is the Stock Keeping Unit, and it’s the code you use to track your inventory. These numbers are unique for every product and will appear on the reports and receipts and in case a customer needs assistance with a product, you will know exactly what he’s talking about.
You can easily create your own SKUs using a tool such as TradeGecko’s SKU generator and implement them into your Shopify store.
Barcodes are generally Global Trade Item Number or GTIN’s. They are mostly used by resellers, and it needs to be legit. You can take a look at the GS1 website and see the standards for barcodes. If you’re reselling through your Shopify store, you will be able to find the barcodes on the original packaging.
After you complete these fields, you can choose to track the quantity and even keep selling the product after it’s out of stock. This is OK for digital, but not physical because you want to make sure you are selling stock you have.
If you decide not to continue selling the product when it’s out of stock, then you need to consider if you want to hide the product page without causing damage.
Lastly, you need to set the total number of units you have on sale. Based on this number, you can tell your visitors how many units you have, and Shopify will know when it’s time to hide the listing.
Shipping
Digital products
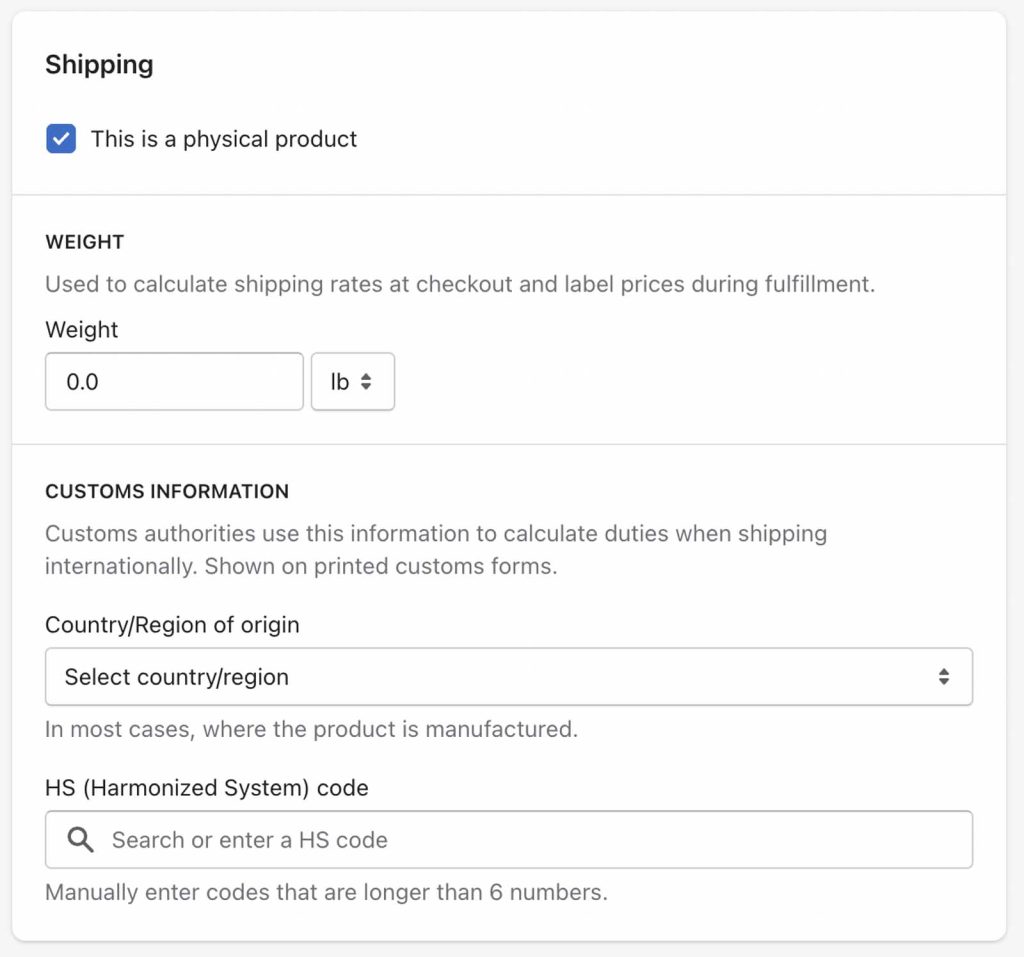
In the shipping tab, you will first need to choose if what you’re selling is a physical product, such as a lamp or t-shirt, or a digital product, such as an eBook or license. If you’re selling digital products, you don’t need to complete this box. Simply uncheck it, and you’re ready to move to the next step.
If you need to use an app for selling digital downloads, we highly recommend Fileflare Digital Downloads. You can see our blog on the best digital products apps for Shopify.
Physical products
If you’re selling a physical product, though, you will need to first add the product’s weight. This will be an important element in calculating the shipping price and time.
Select the product’s manufacturing country and add the HS code. The HS or Harmonized System code is necessary if you’re shipping internationally. It helps the customs offices decide if the items are safe to be delivered in a specific country, as some products may be regulated.
Options & variants

You only need to complete this step if your product comes in more varieties. For example, if you’re selling clothes, your product may have different sizes and colours, and it’s best to add the variants here than crowd your store with a different product for a different size.
You can add your variants followed by a comma, and they will be automatically registered. After this, you need to complete the price, quantity, SKU, and barcode for each variant.
Search engine listing preview
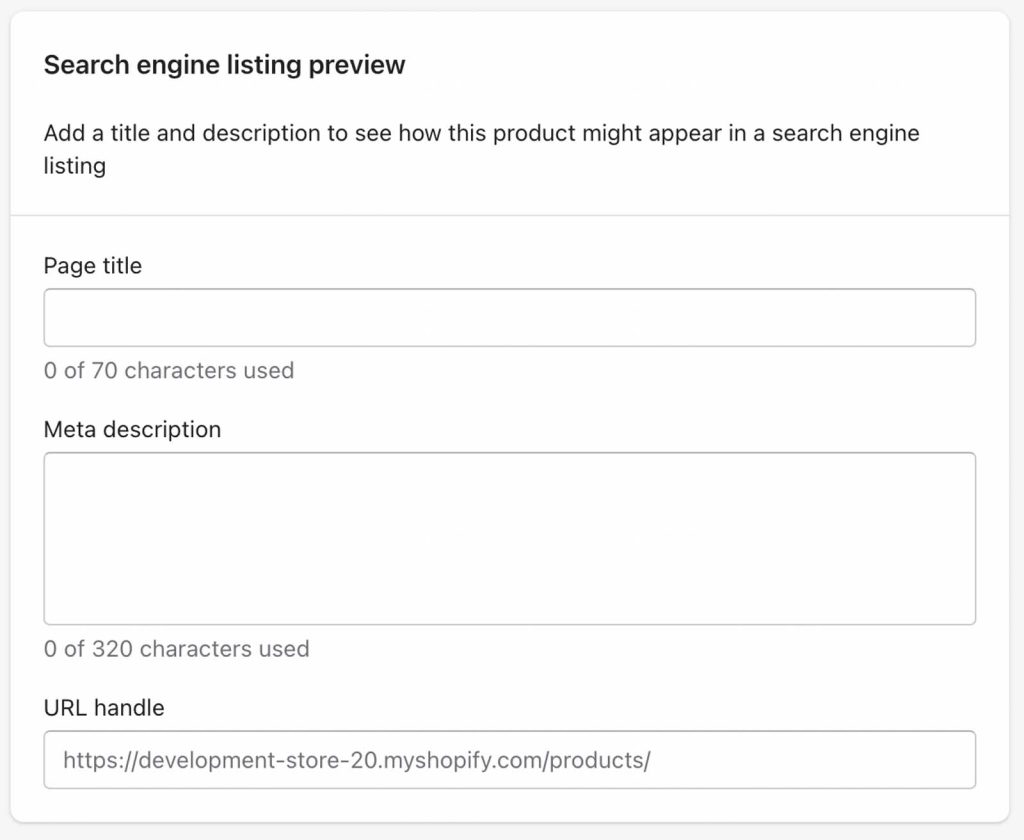
The search engine listing review tab is simply made to customize your product’s information in the search results. You will need to come up with a title, that’s usually your product’s title, a description, and if you want, you can even customize your product’s link.
DO NOT customise your product URL if your product is ranking in the search engines. This will damage your SEO rankings for that product. You can redirect from the old to the new URL, but from all my tests, even 301 redirecting isn’t great and usually makes a bump in rankings, but you can do them if necessary, and if you really need to change the URL.
4. Click “Save”
After everything is done, simply click on the ‘Save’ button. Your product will start showing in your online store, and you’re ready to make a sale. Without proper guidance, it can be hard to add products to Shopify, but I’m sure this guide will help you get your store started!
Now you’ve created a product in Shopify! Learn how to add variants to your product.
Pro tips
Product ID
Once you have saved the product, then it will be created in your store. Your product will have a unique product ID that you can use to identify that exact product in your Shopify system.
Hiding your product
It’s important to know how to hide your product if you are not selling it anymore. Ensure you read our guide so that you don’t cause any SEO damage! You need to make sure that all external links to that page are redirected to a valid page.
Adding a vendor
You can assign vendors to a product in Shopify. You will need to understand this to get your head around what a vendor is.
Currency conversion for other countries
You can automatically convert the currencies to your customers’ home currency. This helps improve conversion rates as customers feel more at home when seeing their own currency.
Adding metafields for custom tasks
Metafields help with customised needs that you might have by collecting specific information from your customers. Learn how to add them to your products.