

Blogging is one of the most effective & proven ways to increase organic traffic on your site, regardless of the type. If it has a blog, and you’re blogging well, being informative and helpful, then you can almost guarantee that, eventually, traffic will start appearing on your site.
You can blog about anything these days, from factual-history-related topics all the way to conspiracy theories, technology, or even cooking. It’s essentially a written form of what would be considered an informative podcast, discussion, topical debate, or anything you can think of.
If you run a Squarespace store and you’re looking for ways to improve the number of sales & organic traffic that occurs on your store, a blog is likely to be the most commonly effective way to improve & create content on your site.
We’ll discuss the best ways to go about doing this, as well as show you how to add blogs on Squarespace in the quickest way while retaining a fair amount of detail.
Why Choose Squarespace for Blogging?
Squarespace is a robust platform that offers a seamless blogging experience. It’s simple enough for beginners to start blogging, yet powerful enough to support your growing business. With Squarespace, you can easily create, manage, and customize your blog posts, making it an ideal choice for bloggers at all levels.
How to Add a Blog to Squarespace: A quick overview
Adding a blog on Squarespace is straightforward. Here’s a step-by-step guide:
- Log in to your Squarespace account: Start by logging into your Squarespace account and navigating to your website editor.
- Add a new page: Click on the ‘+‘ icon to add a new page. Choose ‘Blog‘ from the options.
- Name your blog: Give your blog a name that reflects its content or purpose. This name will appear in the navigation menu of your website.
- Create a blog post: Click on the ‘+‘ icon again to create a new blog post. Here, you can add a title, write your content, and add images or videos.
- Customize your blog post: Squarespace offers a range of customization options. You can add tags and categories, enable or disable comments, and schedule your post for publication.
- Publish your blog post: Once you’re happy with your blog post, click ‘Publish‘. Your post will now be live on your website.
Adding a blog page to Squarespace
The most effective way to add a blog to Squarespace is by adding a blog page. You can easily do this in your page panels editor.
Ensure you don’t confuse a blog post with your blog page. They are two different things.
1. Adding the initial blog page
- Firstly, ensure you’re on your Squarespace dashboard and select the site you want to edit.
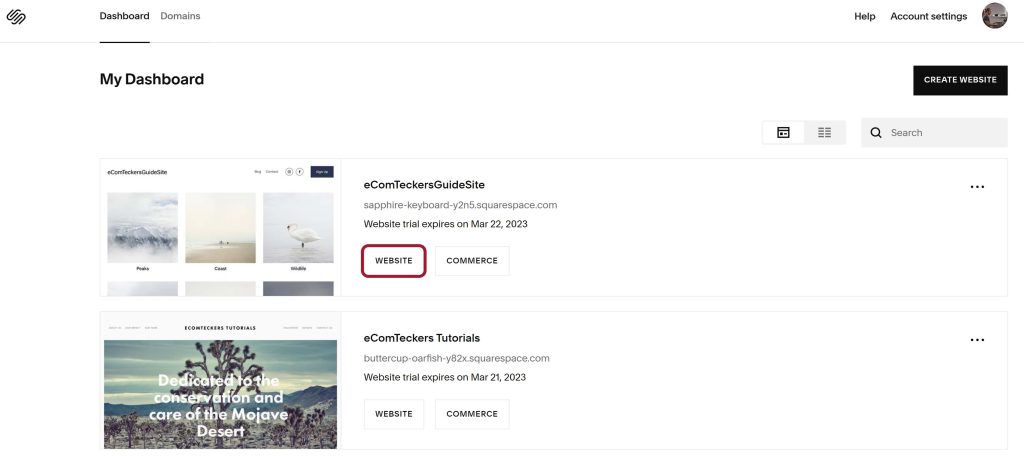
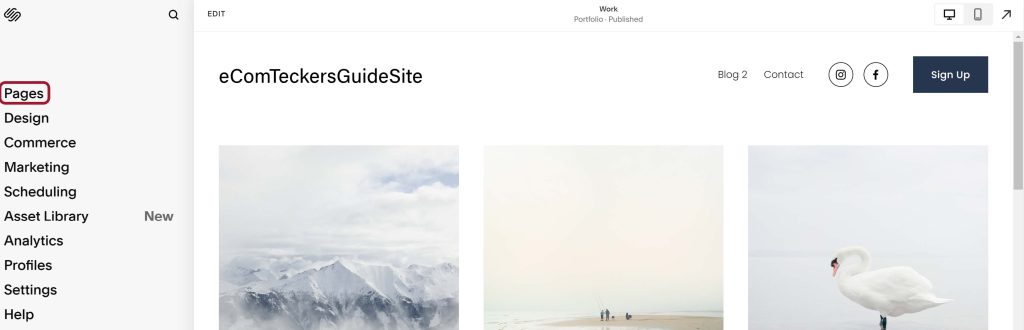
- Next, select “Pages” within the list on the following page.
- Click the “+” sign next to “Main Navigation” and select “Blog” under the “Collections” category.
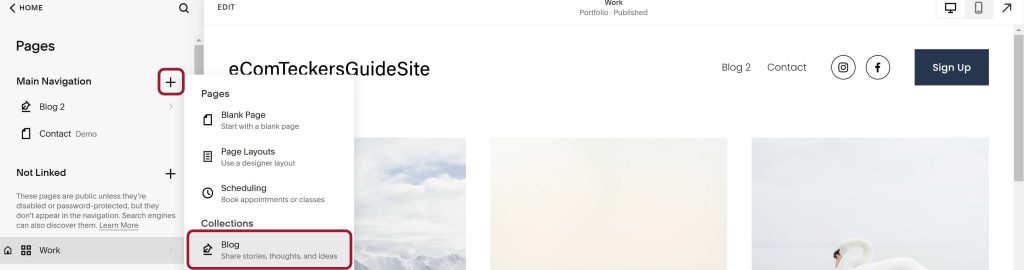
Once you’ve followed the above steps, many options should appear. This is now your choice for selecting a layout for your blog page. There is no wrong choice here, so you don’t need to think too hard about choosing.
2. Editing your blog page
We strongly recommend you edit your main blog page before adding existing blogs on Squarespace or creating any news.
The reason for this is that it’s the page where any & all future blogs will appear once created, so you’ll want to get it up to snuff before creating any blogging content for your Squarespace store or site.
We recommend creating a pleasing aesthetic without too much information at first glance. Your users will be reading the posts, not the page the posts are located on, so as little reading as possible before they get to the actual blog posts is ideal.
The last thing you want to do is tire out your users before they get to your content, as this will only increase the bounce rate of your store/site, which isn’t good in any scenario.
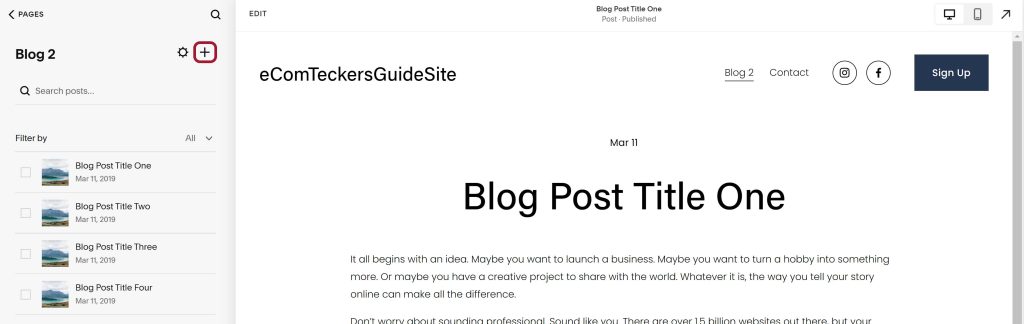
3. Blog page settings
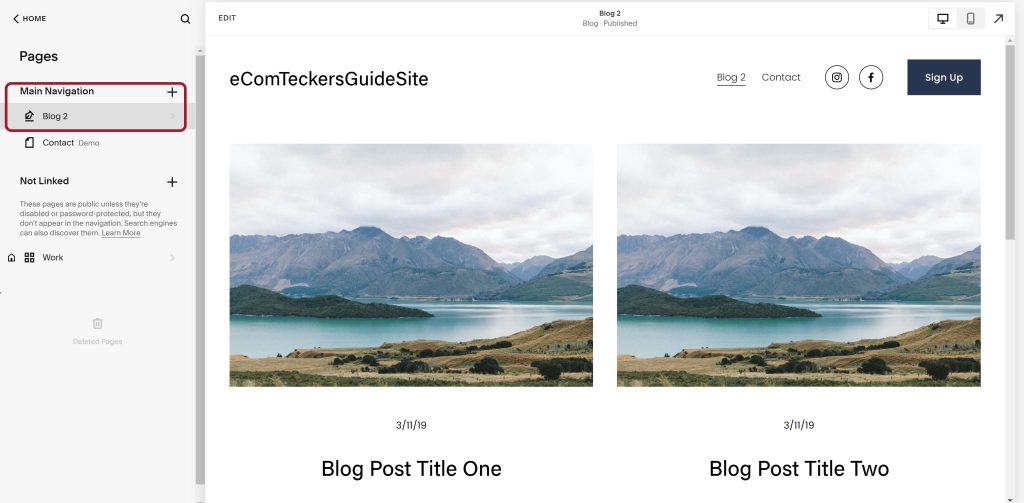
Select the gear icon next to the blog page name. For example, ours is “Blog 2” in the image above to help you find yours. A new window will appear in the middle of your screen once selected.
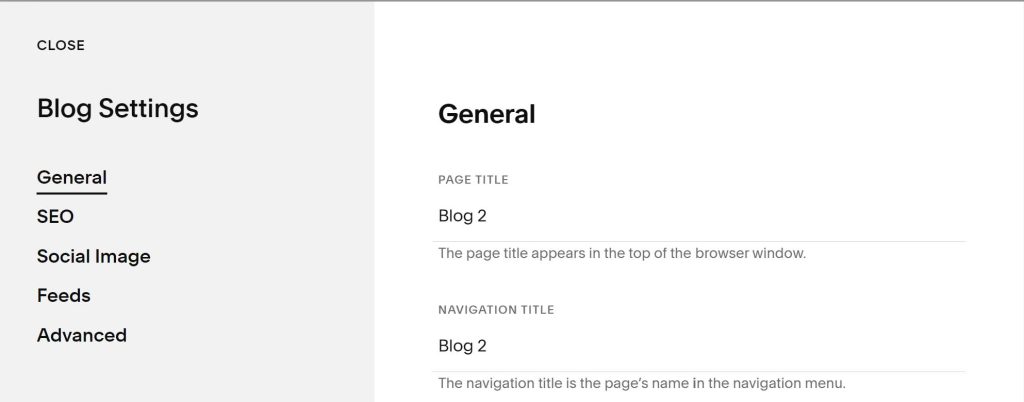
There are 5 main categories on this new window. We’ll go through them in detail and what they cover below.
General
The general settings cover everything you’d expect them to cover, such as the “page name” and “navigation title“, which changes the name of the blog title on the navigation page. We suggest keeping this title the same as your page name to avoid user confusion.
You can also disable/enable your blog posts through this setting. However, we don’t recommend this solely due to SEO reasons. If people click links on your page and they lead to dead links or disabled pages, it will eventually harm your SEO page rankings, affecting the traffic that reaches your store/site.
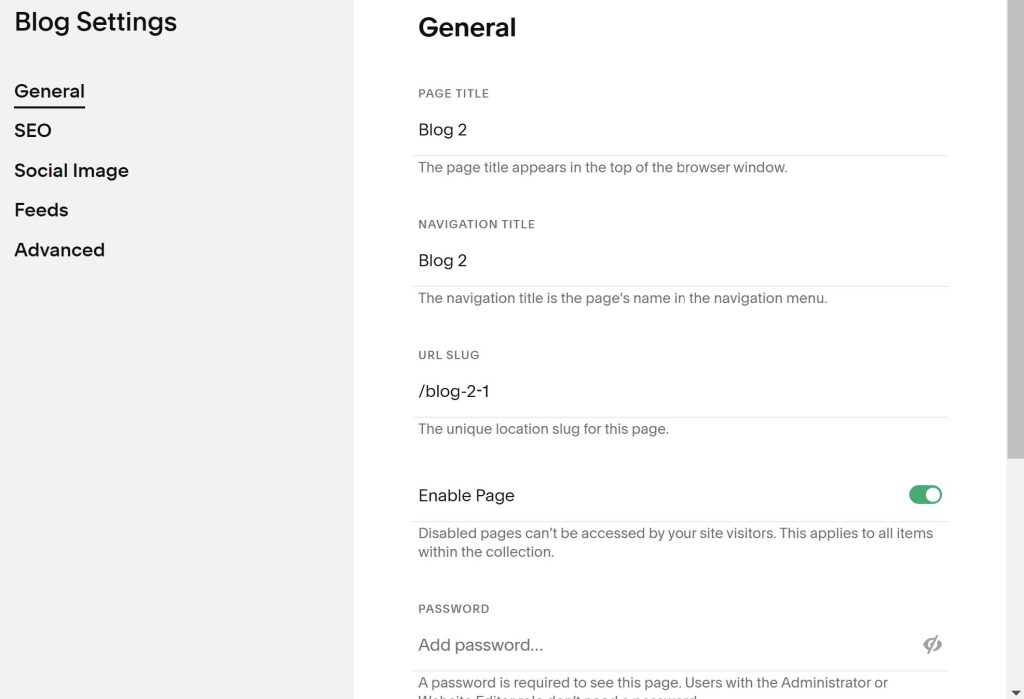
You have the option of changing the number of blog posts that appear on your navigation page. You can change this from anywhere between 1-20. With this setting, it’s the more, the better. Unfortunately, 20 is the base limit and can’t be exceeded on Squarespace.
SEO
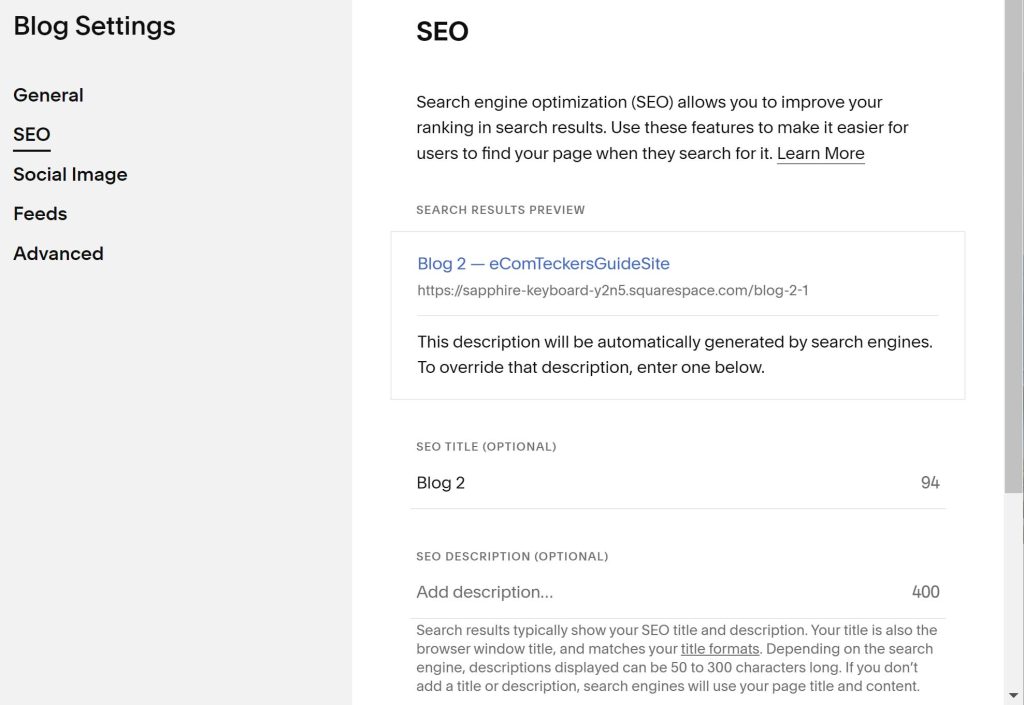
Good Search Engine Optimization, the MacGuffin of websites. It’s safe to assume that if your site has plenty of good, helpful, or informative content, then you’ll get traffic on your site. Only as long as you’re following SEO basics, though.
You can change how your post appears on search engines in this category. Squarespace does an excellent job of recommending and maximum amount of characters in each option to ensure you don’t exceed the ideal amount, as it can harm your SEO score.
You can hide pages, categories, or tags in collections from search results in this section without harming your SEO score. This is at the bottom of the SEO category.
Hide what you don’t use. For example, some sites use tags instead of categories or vice versa. We recommend you use all of them if possible, as it will only make it easier for your users to browse your site.
Squarespace offers some fantastic & helpful tools to help you with SEO content on their platform. What to do & what not to do. It’s very easy as long as you’re paying attention.
Social Image
A very simple option to change the image that will appear on social sites if your blog post is shared. There’s nothing else to this setting. Ensure you pick a pleasing, simplistic, and relevant image that matches the content of your blog post.
Consider what would catch your eye when scrolling through your Facebook or Twitter feeds. Is it something you’d click on? Try to follow your gut and chase it from a logical perspective.
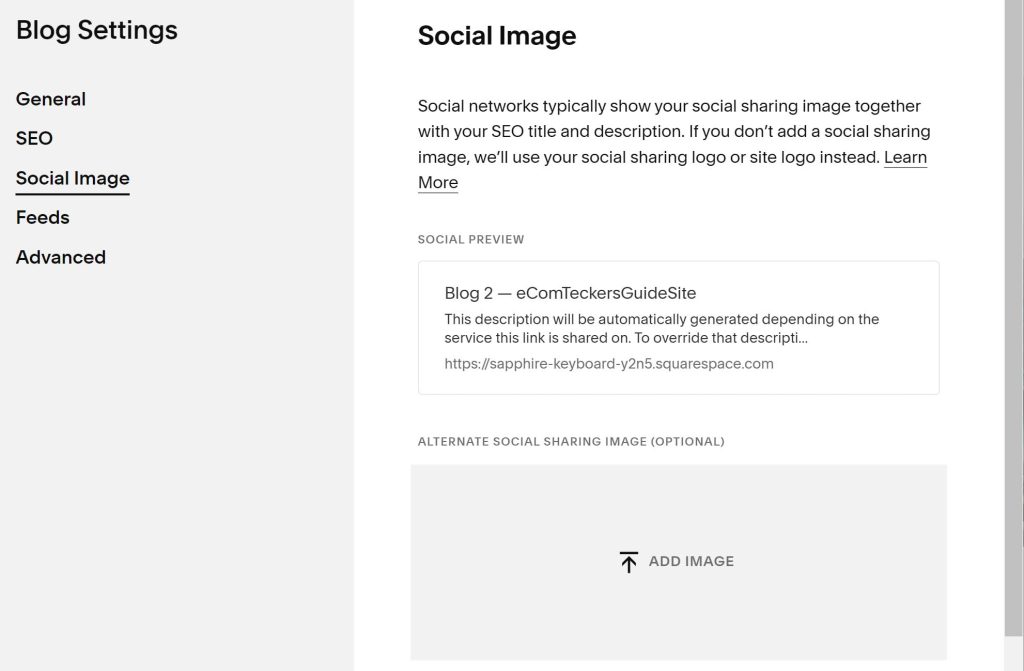
Try not to copy what everyone else does on social sites. Be creative, and be unique with it. Create your own style and try to keep to the same aesthetic as your store. It will really assist you in the future.
Feeds
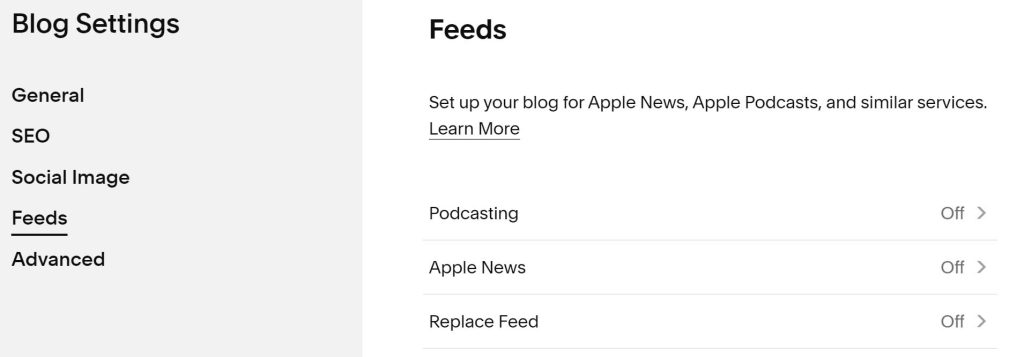
The feeds category allows you to integrate an external feed such as podcast posts, apple news feed, or pretty much any other feed such as a news & announcements forum.
If integrating any external feeds, we highly recommend keeping to the topic of your site, as it will only help to boost your topical authority within that chosen topic.
Advanced
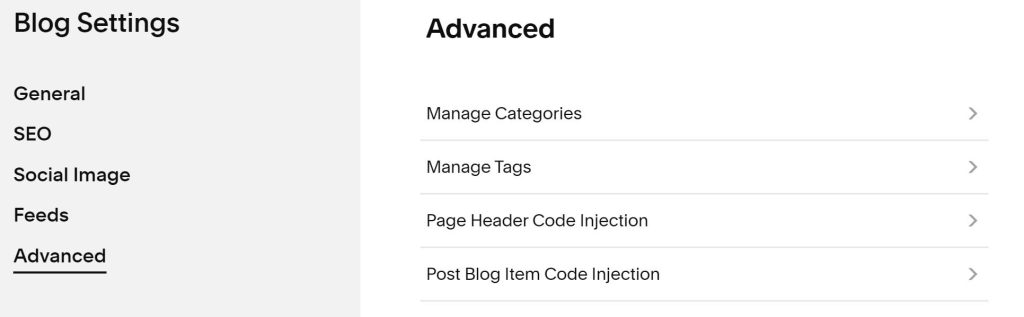
This is where it can get a little more complicated for anyone new to working with websites.
You can manage your tags & categories here once they’ve been created. This will help you to keep everything organized with any relating to tags & categories.
The other options in this menu are to inject code into your site to improve your pages. The two options are called “Page header code injection” & “Blog post item code injection“
You will only need to use the above options if you already have bits of code ready to import into the store/site. If you don’t, you can safely ignore this.
4. Creating your blog posts
If you go back to your pages menu in the page editor. Select your blog page by clicking the name or the “>” icon.
You can create a blog post by clicking the “+” icon next to the blog page name. Clicking the plus icon will create an entirely new blog page that you can start off with creating.
You can “Duplicate” or change the “Settings” of each post as you edit it or from the blog page menu. We’ll discuss the blog post settings in more detail below.
5. Blog post settings
You will see some new categories in this settings menu as opposed to the previously abovementioned blog page settings and you will also see a couple of similar categories (“SEO” & “Social Image“).
We will discuss all the new settings below. If you want to see “SEO” & “Social Image” settings, scroll up to “Blog Page Settings“.
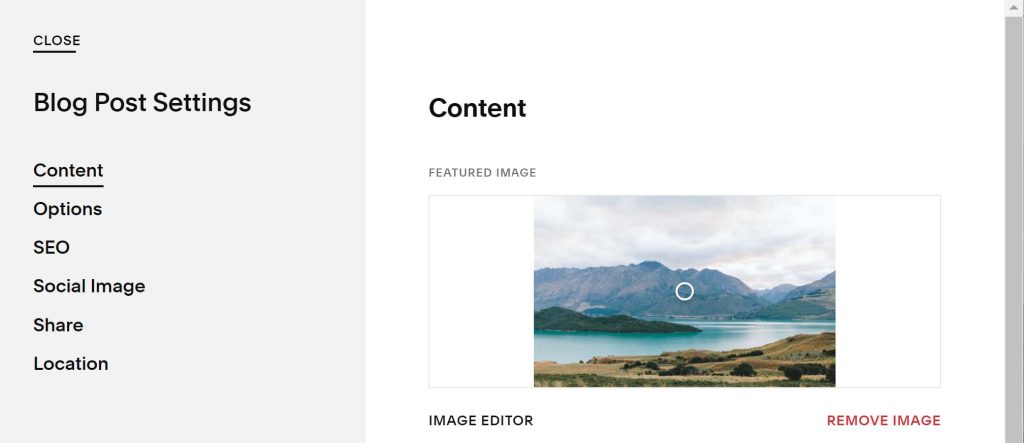
Content
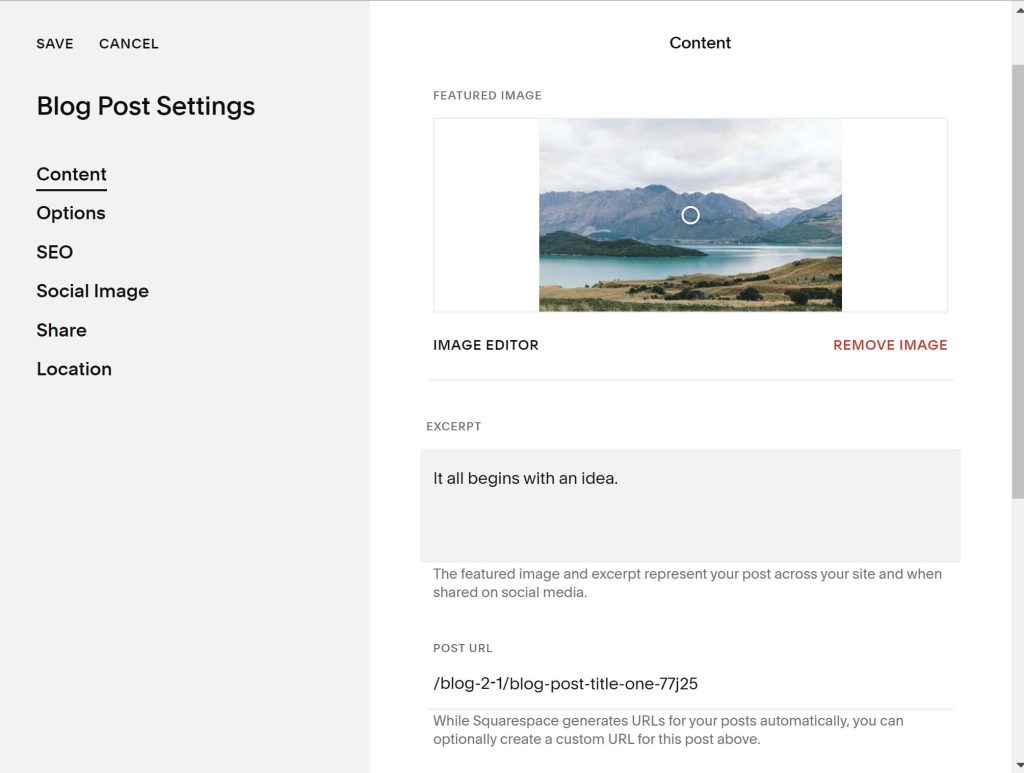
Content involves changing the featured image on the blog page menu to display the post to users.
You can also change settings such as the post URL (which you’ll want to keep short and sweet), the Author, and Source URLs, which are great but not entirely necessary as long as you’re using good practices with anchor text and both internal linking and external linking.
Options

The options for blog post settings allow you to enable/disable comments and change the status of the blog post to “Draft“, “Published“, “Needs review“, or “Scheduled“. You can also set a scheduled date if you want to schedule your blog posts.
You can add/remove categories and tags to your blog posts as well as decide whether you’d like the post to be a featured post or not. This means they’ll show up before any other blog posts. Sort of like a pinned post on a social media profile.
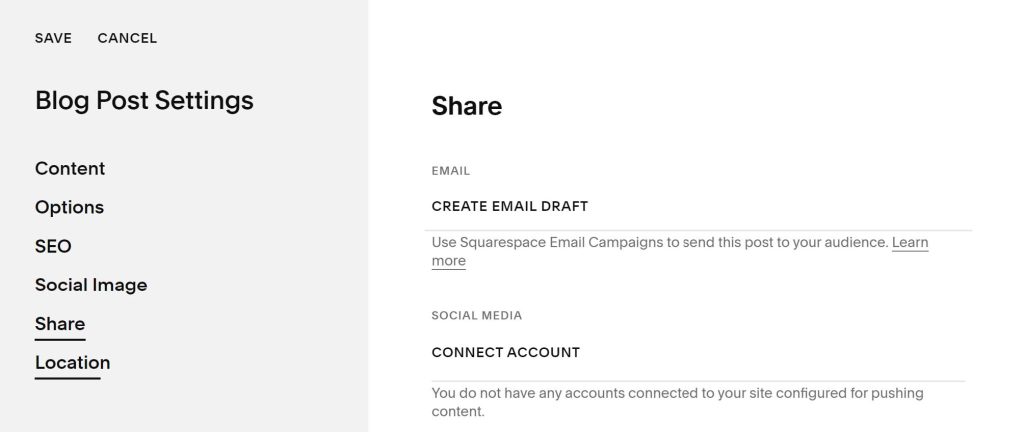
Here, you can connect any social media accounts you have connected to your store or website. When you publish your blog posts, you can set them up so the site shares them on a social media of your choice. We strongly recommend you set up your “Social Image settings” for the blog post before you do this.
You can also edit these settings so your blog post is emailed to your audience as it’s published, although this can only be done if people have signed up for your site newsletter or mailing list. You can learn how to do this in our guide on adding newsletter & form buttons to your site.
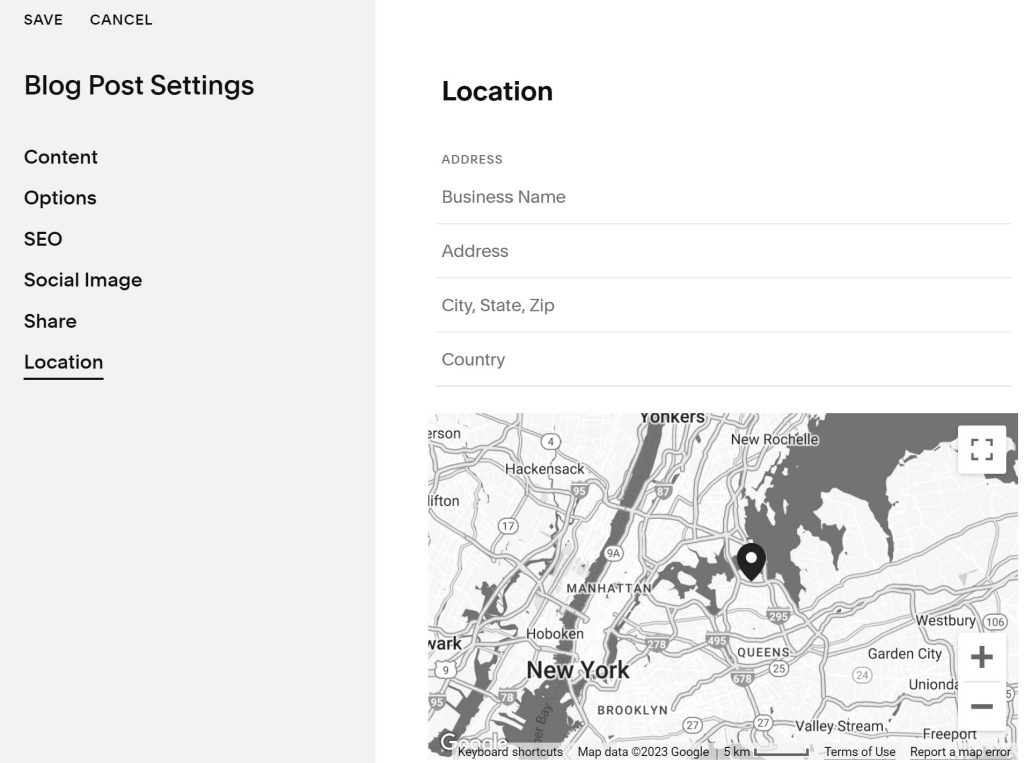
Location
As expected, this allows you to set a location for your blog post. Now, this isn’t strictly necessary for most types of blogs on Squarespace. We only really recommend this when it’s related to the post.
For example, if you’re writing a travel blog and want people to know where you’re talking about or if you’re creating an informational piece of content relating to geographic locations or even talking about a specific business.
AI Content for creating blogs: Is it good or bad? Is it safe to use? + How to detect it
Despite what type of blog you’re trying to create, try your best not to use AI content where necessary. Google has already started punishing some sites with heavy AI content that isn’t reviewed by people and quality checked for informational accuracy.
Essentially, it’s okay to use AI, but only as long as you’re ensuring that the content on your site is 100% factually correct, helpful, informative, and suitable for the user. You NEED to review the content before it’s posted. AI doesn’t always get it right the first time.
AI can be good when used correctly and properly, but it’s not good to rely on it all the time. We always need human input. Unfortunately, AI just isn’t that good yet.
The keyword to take away from this is, in Google’s own words, “Appropriate use of AI or automation is not against our guidelines“. The most powerful word in this statement is Appropriate. You have to use AI responsibly.
You can’t be lazy and wholly rely on it to do your work. You need to be responsible and ensure the content being produced on your site is high-quality.
If you have hired a team of writers or even a freelance writer and you suspect them of writing with AI content, you can easily detect this by using an AI content detector. We’ve linked Copyleaks’ AI content detector since we feel this is the best one to use, and it’s free!
You can detect any AI content from ChatGPT, GPT 3, Human & AI + Human, which will detect if AI content has been used and a human has changed some text.
You can read more about their content updates for blog/informational sites on their content update feed.
Writers’ block & researching competing blog posts
Writers’ block is tricky. It can be tough to find where to start before creating your content or even halfway through creating the content.
What we recommend when you have writer’s block is to come away from your piece of writing for at least a few minutes and focus on something else unrelated to the topic, such as a quick 5 minutes walk outside or even watching a quick YouTube video.
It can really do wonders for the brain, coming back to a piece of writing with a fresh mind. If you’re still stuck with writing, we strongly recommend doing some more research on the topic.
If you’re writing for a specific keyword (e.g. How to fix my WiFi connection), type the keyword into Google, research your competing posts & websites, see how they talk about things, and how they structure their posts and do it better.
You can also use this method to improve your keyword research and improve old content on your site that has since lost some of its page ranking scores over time.
Tips for Optimizing Your Squarespace Blog
- Use SEO-friendly titles and descriptions: Search Engine Optimization (SEO) is crucial for increasing your blog’s visibility on search engines like Google. An SEO-friendly title should be descriptive, include your focus keywords, and be under 60 characters so it doesn’t get cut off in search results. The description, which appears below the title in search results, should succinctly summarize the content of the blog post and include your focus keywords as well.
- Add a thumbnail image to each post: Images can significantly increase engagement with your blog posts. A thumbnail image gives potential readers a snapshot of what your post is about. Ensure your images are high-quality, relevant to your content, and have descriptive file names and alt text for SEO purposes.
- Use categories and tags: Categories and tags help organize your blog content and make it easier for readers to find what they’re looking for. Categories are broad groupings of your content, while tags are more specific and describe your post in more detail. Both can improve your site’s SEO if you use them to include keywords related to your content.
- Enable comments: Comments can increase engagement on your blog by encouraging readers to interact with your content. They can ask questions, share thoughts, or provide feedback. Make sure to monitor and respond to comments to maintain a positive and interactive environment.
- Share your posts on social media: Sharing your blog posts on your social media platforms can significantly increase your blog’s visibility. It can drive traffic from your social media accounts to your blog, potentially increasing your readership. You can also encourage your readers to share your posts on their own social media accounts to reach an even wider audience.
- Consistent and Regular Posting: Search engines favor websites with regularly updated content. Maintaining a consistent posting schedule can help improve your blog’s SEO and keep your readers engaged.
- Mobile Optimization: More and more people are using their mobile devices to read blogs and browse the internet. Ensure your Squarespace blog is mobile-optimized to provide a good user experience for all readers, regardless of the device they’re using.
- Use Analytics: Squarespace provides built-in analytics tools that can help you understand your audience better. You can see which posts are most popular, where your traffic is coming from, and what keywords people are using to find your blog. This information can help you tailor your content to your audience’s interests and improve your SEO strategy.
By implementing these tips, you can optimize your Squarespace blog for both search engines and your readers, potentially increasing your visibility, engagement, and readership.
Conclusion
Blog writing is easier than it sounds to get started with, especially on Squarespace. They provide all the tools you may possibly need in a very easy & intuitive way for the user to get used to.
They also help make it easy to create a blog post & section on your store or site, but they also offer many other tools to help with SEO and other aspects of a blog post.
If there’s anything else you’d like to know about adding blogs on Squarespace or what to consider when creating blog posts, then contact us and we’ll be happy to help.