

Buttons are an excellent method to help improve user engagement on your site if used correctly. A strategically placed button can help increase user engagement and, depending on your site’s content, help to improve sales or even traffic in particular circumstances.
You can pretty much add buttons anywhere you like on your site. As one would naturally assume, buttons are widely supported with the Squarespace platform and are one of the most effective ways of increasing user engagement and sometimes dwell time.
We’ll discuss how you can add a button on Squarespace whilst providing images, examples & step-by-step guides, along with questions about buttons frequently asked by site owners on Squarespace.
There are several types of buttons you can add to your site, not just button blocks. This includes:
- Footer & Header buttons – A relatively self-explanatory example of using buttons. These add or integrate buttons into your headers or footers.
- Auto-layout buttons – An auto layout will present your content in a row or column with buttons included. An example of this would be presenting users with 3 different payment plans for a subscription.
- Image block buttons – You can integrate buttons on, with, or alongside your images. It can either turn an image into a button, or you can pair an image with a button.
- Commerce & Donation buttons – These include buttons such as “Add to cart” & “Donate” buttons. For example, a donation button could lead to a BuyMeACoffee or a Patreon page.
- Promotional Pop-up buttons – Pop-up buttons can appear when you first visit a site, and they invite you to join their mailing list or subscribe to be able to read the content, such as a premium news site.
- Form & Newsletter buttons – Form & newsletter buttons are a less forward way of getting people to join a mailing list. They usually appear at the bottom of a page and allow people to sign up for a newsletter or exclusive mailing list.
- Pinterest buttons – Pinterest buttons are exactly what they sound like. They allow a user who is browsing the site to be able to save or share content from your site directly on their interest profile.
Button blocks are the most common, straightforward method of adding buttons to your Squarespace site. You can add them pretty much anywhere you’d like to on your site with ease.
1. Go to the page panel editor
First, you must be in your page editor to add a button on Squarespace.
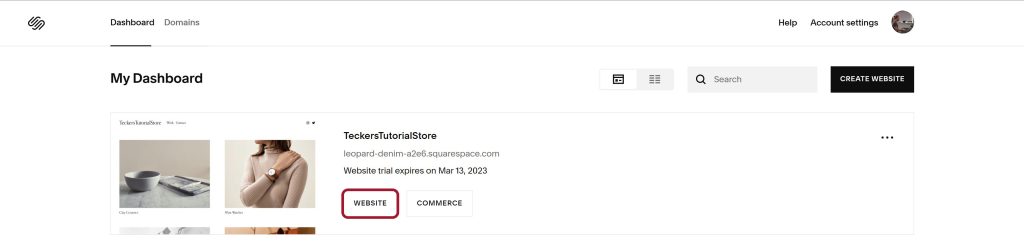
- Go to your Squarespace dashboard and select “Website“. This will bring you to your page editor.
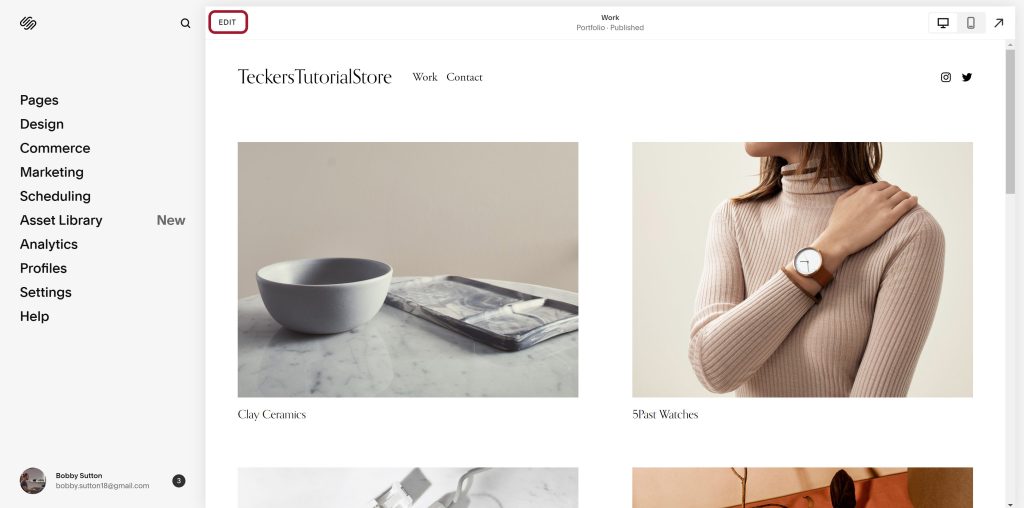
- Select “Edit” on the next page. You should now be within the page panel editor. Go to the page you’d like to add a button to.
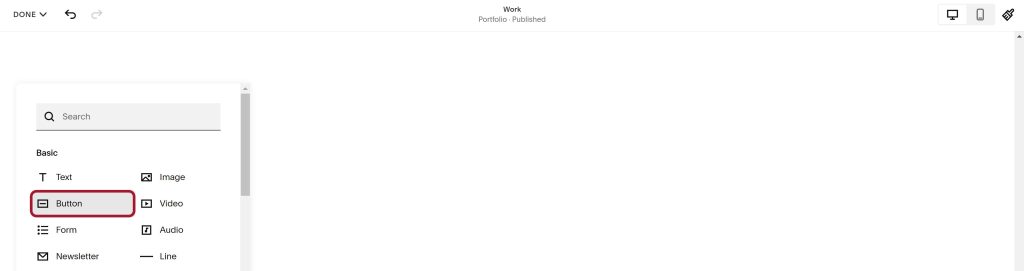
- Scroll to the section of your page where you want to add a button and select “Add Block“. Then select “Button“. That’s how you add a button to your page/site.
3. Button block settings
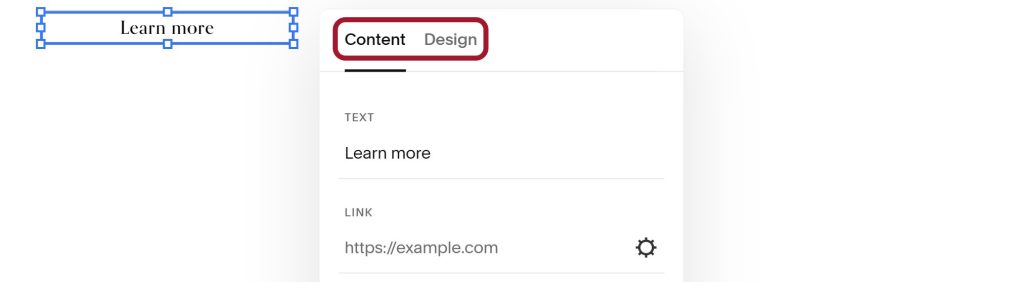
Several settings appear when adding a button block to your page/site. We’ll go over each setting in detail. You can access these settings by selecting the pencil icon once you click your button.
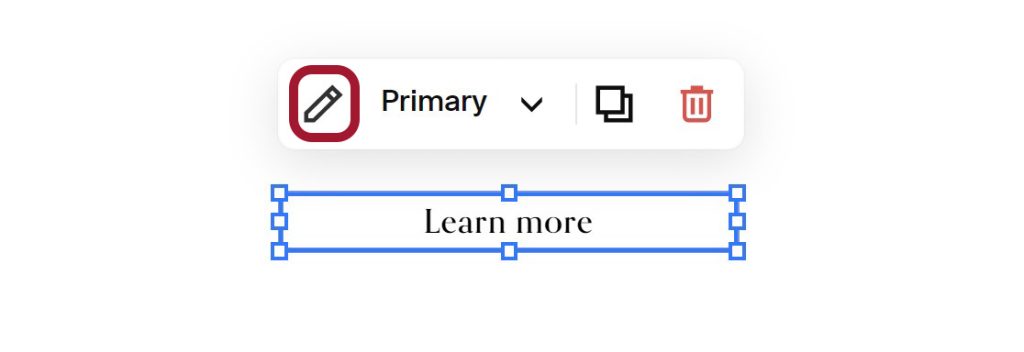
In the settings menu, you can change the button’s text, and add the link for the page you want to open when users click the button under the “Content” tab. You can change the design of the button and the size too under the “Design” tab.
Footer & header buttons, as mentioned earlier, are buttons that integrate with or alongside your header or footer. They’re usually used for functions such as a “Contact us” button or a “My Orders” button on an online store.
They’re very common and are good at helping fill out empty spaces you can sometimes be left with on a header or footer when creating a website.
1. Go to the page panel editor
When you’re on the settings for the site you want to change, select “Edit“, and you’ll be on the pages panel editor.
You can start editing your header or footer by scrolling to either and selecting “Edit Site Header” or “Edit Footer“.


- When accessing your header or footer settings, a pop-up will appear with global settings. Select “Elements” in this window.
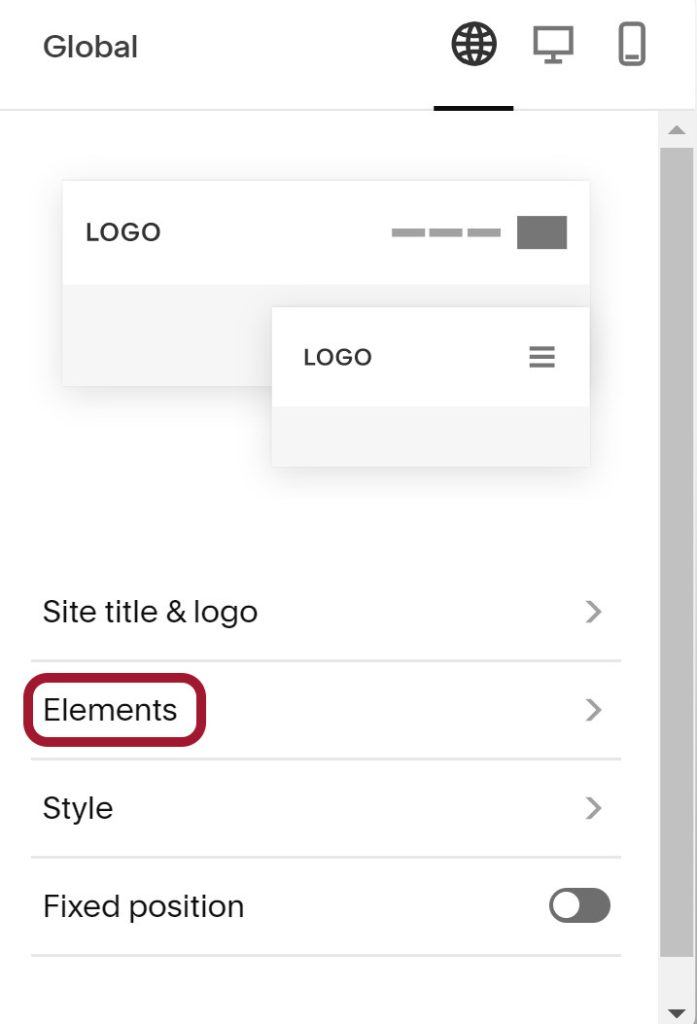
From here, you can change all the settings you require for the button on your site header. This includes adding links to other pages through the buttons or even social links leading to Facebook, Twitter, Instagram, or Pinterest.
Auto-layout buttons are buttons you can add as a preset column or row. It’s like a gallery section but rather than focusing on images, it focuses on buttons, as one would assume.
This doesn’t mean you can use images with the buttons. In fact, that’s the most used function of an auto-layout button. It’s used to display images as buttons alongside each other. For example, a picture of a dish, when clicked on, will display the recipe and cooking instructions for that dish.
Before you start with the steps below, go to your page editor. (You can view the steps for this above in the method for “Adding a button block“)
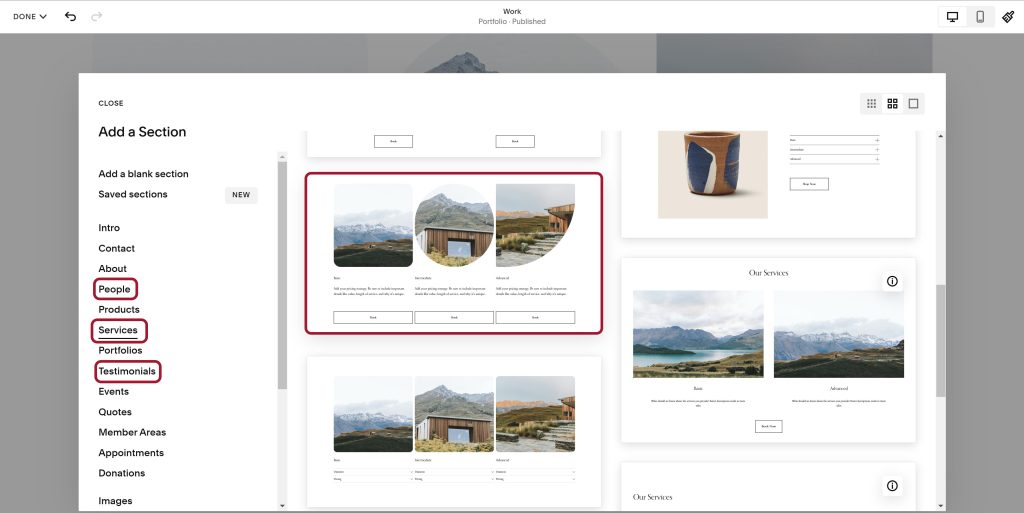
Go to the page you want to add an auto layout button and add a new section. It’s pretty easy to do this. Scroll down to see blue horizontal bars labeled “Add Section“.
Click “Add Section” on one of these blue bars, and choose either “People“, “Testimonials“, or “Services“. (You can do this for other categories, such as Products, these are just some of the more commonly used examples).
Once you do this, you’ll see several preset layouts for what you want to add. You can see a good-quality example of an auto-layout button below that provides 3 different types of services.
2. Auto-layout settings
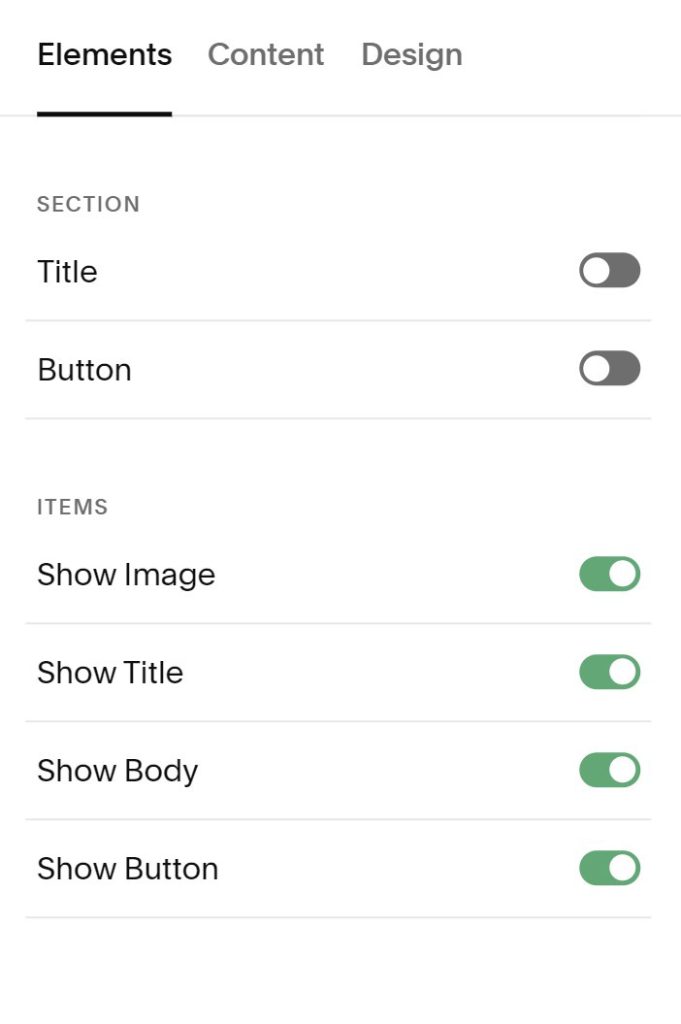

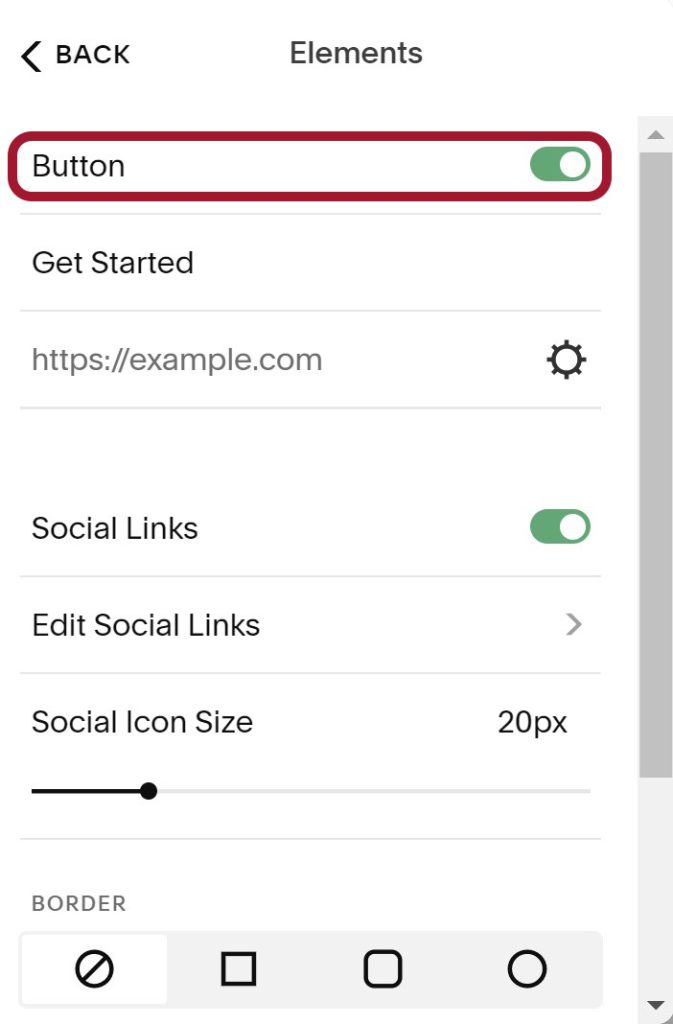
The settings in the auto-layout button are one of the more intuitive settings menus. You can change anything from design to content and the elements of the button.
The “Elements” tab includes settings to show specific elements of the button on the page to users.
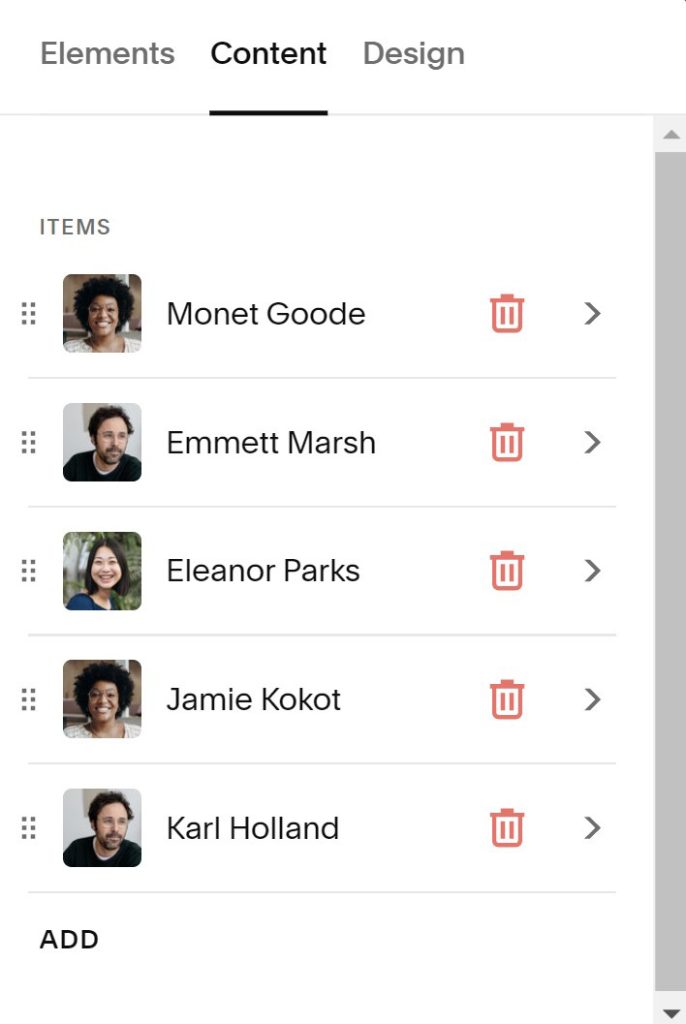
The “Content” tab, as one would naturally assume, gives you control over the content within the auto-layout button. You can put anything you like here, such as pictures of products you plan to advertise/sell, author pictures, or even pictures of finished dishes so people can click on them and view recipes.
The “Design” tab will allow you to change the visual aesthetic of the auto-layout button. You can change how the layout appears, increase & decrease the “Max Columns“, and even enable an infinite scroll if you choose to.
The donation button is very self-explanatory. They usually lead to sites such as “BuyMeACoffee“, “Patreon” or “GoFundMe“. They’re commonly used on sites such as influencer linktree sites or charity pages.
It’s fairly easy to add to a page. We’ll discuss how to do this in the steps below.
- First, ensure you’ve got space in the section you’d like to have a donation button. If there isn’t any, make some or create a blank section. Once you’ve done this, click “Add Block“.
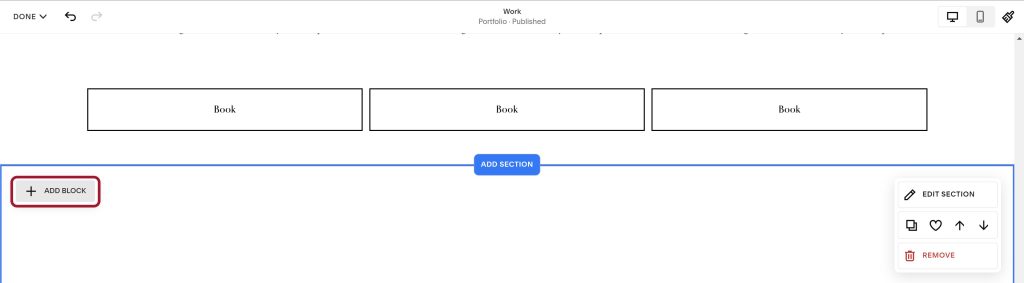
- It’s now time to add your donation button. Once you’ve clicked “Add Block“, scroll down toward the bottom of the pop-up window and see an option called “Donation“. Select it.

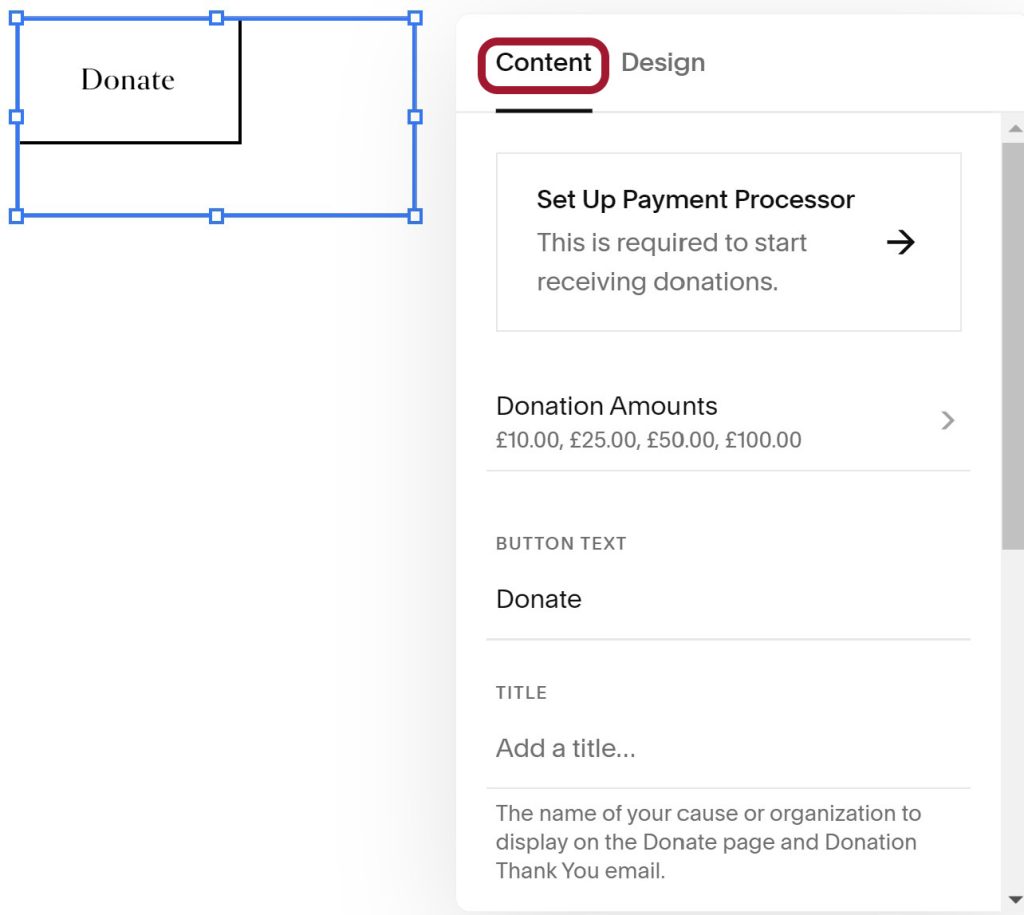
The settings for a donation button allow you to change anything from the payment processor you want to use for the donation or even the donation receipt contents.
The “Design” tab only contains settings for aligning your button on your site. The majority of settings are included within the “Content “tab.
Commerce buttons are used in pretty much every online store that uses the Squarespace platform. If you run an online store on Squarespace, knowing the ins and outs of the in-built commerce features is an absolute must.
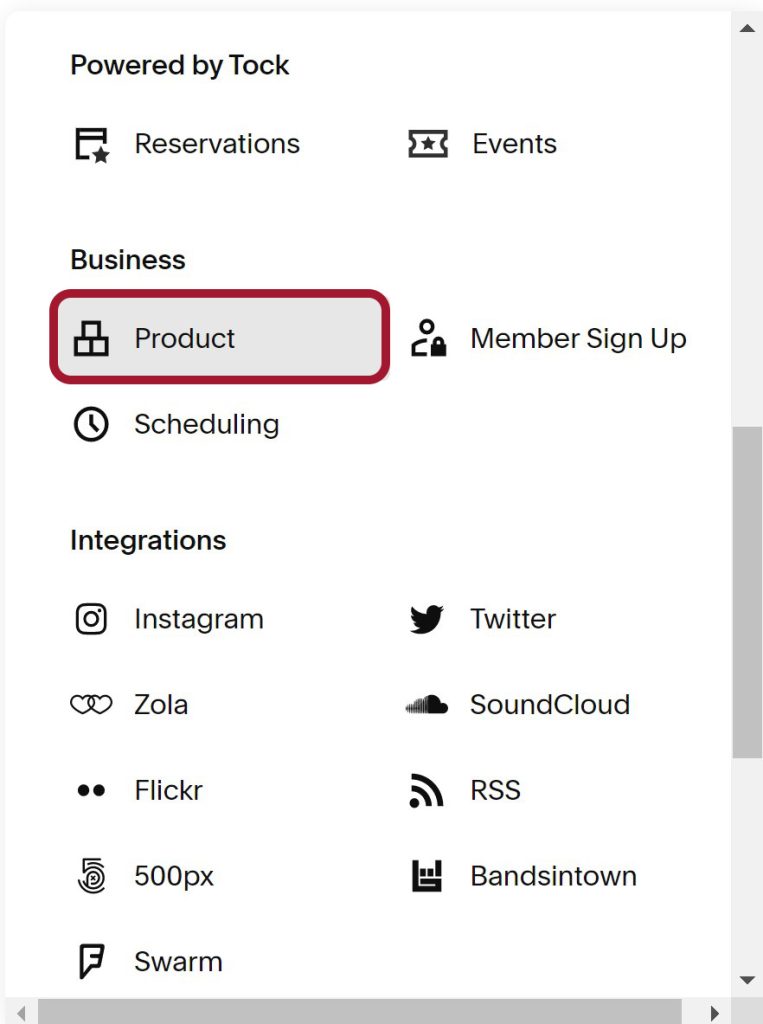
In a section where you have space to add a new block, select “Add Block” and scroll down to “Product” under the “Business” section.
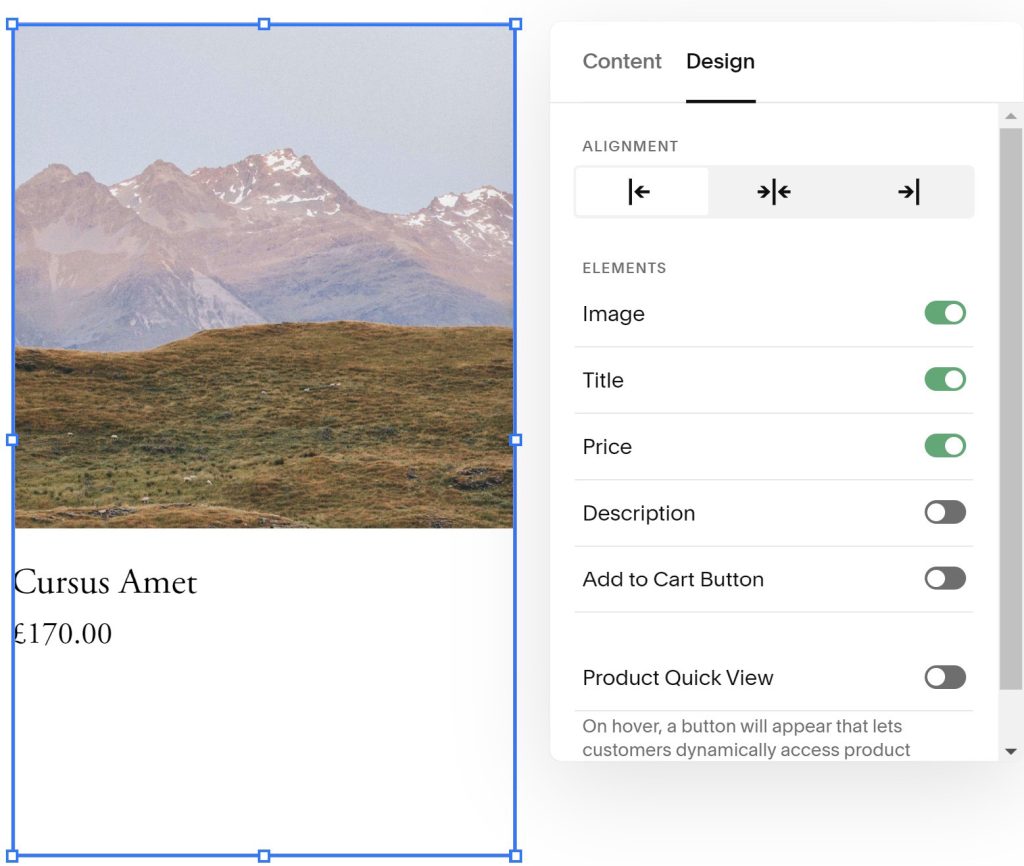
Most initial settings are under the “Design” tab with the commerce button. There are more advanced steps you need to take if you haven’t got any existing products on your site, and that’s to add a product to the button by creating a product.
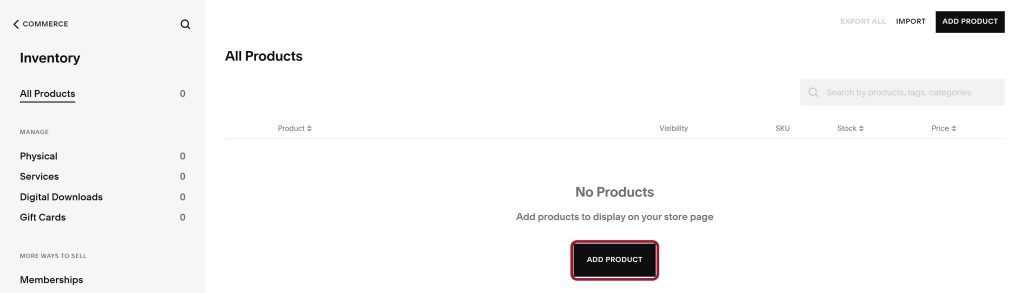
You can create a product by selecting the “Add a product” option under the “Content” tab. You’ll then be brought to a new page where you can create a product or edit any existing products on your site.
These buttons are images that have the same function as a button. They’re used for many reasons, sometimes to make a button stand out more than it would if it didn’t have an image.
One good example of a use for image blocks is clicking on a picture of a dish, which would then bring you to a page discussing the method of creating the dish along with the recipe.
Before following the below steps, make sure you’re on the page you’d like to add the image block and ensure you have a space to add the new block.
1. Adding an image block
Adding an image block is one of the more accessible buttons to add to your site. Click the “Add Block” option to see “Image” at the top.


2. Image block settings
Image block settings have several options on both of the “Content” and “Design” tabs.
In the “Content” tab, you’ll find settings that include the option to “Add an Image“, attach a link to the image, and several other options.
In the “Design” tab, you have a bunch of other options that involve the option to change the “alignment“, “fill option“, and “radius” of your image.
Promotional pop-up buttons are commonly used to encourage a user to sign up for a mailing list or provide an on-site pop-up to encourage someone to subscribe to a site membership.
They can be a bit annoying depending on the type of site you’re visiting. They’re used in many news sites to ask people to sign up for their site newsletter by providing an email.
The process of adding a promotional pop-up is slightly different from that of other buttons. Ensure you’re just on your site settings, not in the page panel editor.
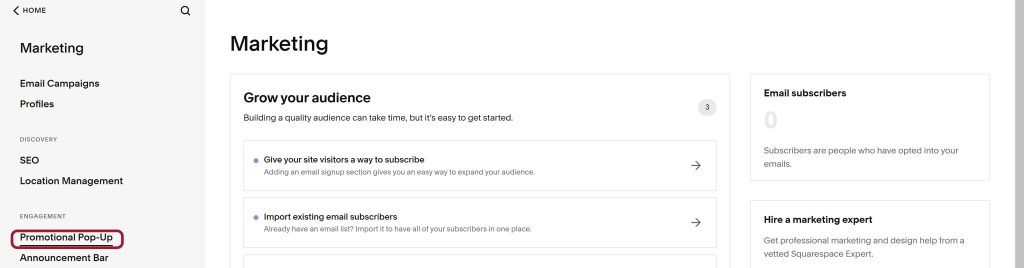
- Select “Marketing” from the list on this page.

- On the next page, select “Promotional Pop-Up“.
2. Promotional pop-up settings
You should now be on the promotional pop-up settings page. You can see a current example of what the promotional pop-up will look like when someone visits your site for the first time.

The promotional pop-up settings are quite thorough. They cover everything from changing the style of how the pop-up looks to the content and timing of the pop-up.
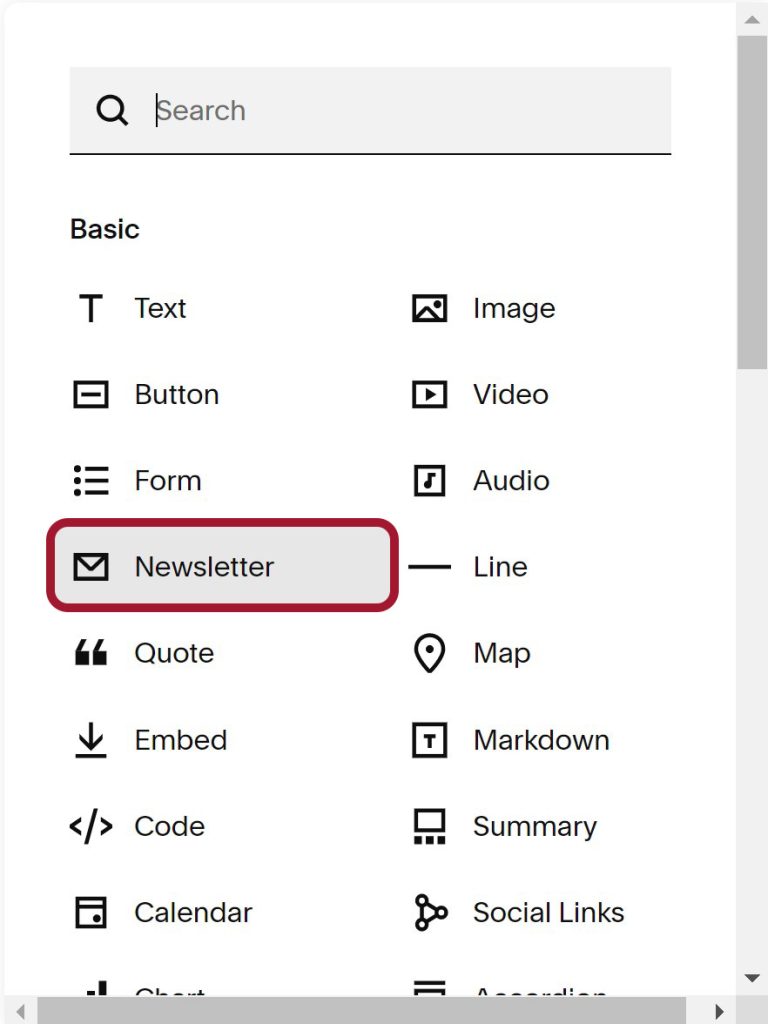
Newsletter buttons are a less aggressive form of a promotional pop-up button. They’re usually placed along the side or bottom of a page to give a site the option of signing up for a newsletter by providing their email.
You can add a newsletter button by selecting “Add Block” in the section you’d like to add a newsletter to. These newsletter buttons are most commonly situated toward the bottom of a page.
The users that reach the bottom of a page are more likely to subscribe to a newsletter as they likely found the content engaging enough to reach the bottom of the page.
2. Newsletter settings
The settings for newsletter buttons include some settings that other buttons don’t quite provide, such as a “Storage” tab on top of the usual “Content” & “Design” tabs.
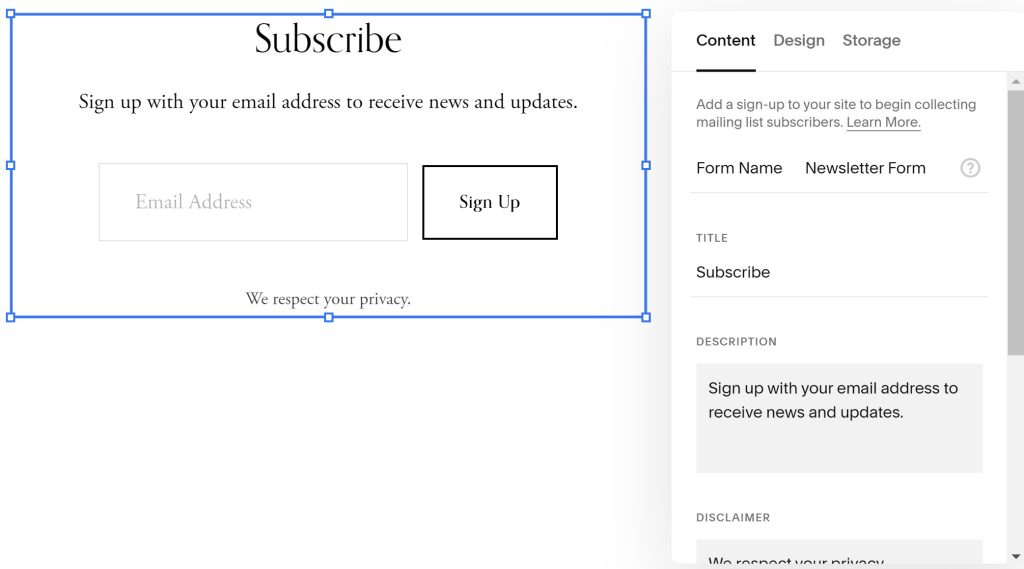
The Storage tab includes alternative storage locations and the ability to connect to Google Drive, Mail Chimp, or Zapier so you can store users’ details securely. You can change the mailing list that a user gets sent when they provide their email and even make it so the user needs to enter a Captcha code when using the newsletter button.
Form buttons are commonly used as “Support” or “Contact Us” sections. These are highly recommended to add to your site. If any of your users encounter issues with the site, they’ll be able to contact the site owner through this method for help with the issue.
It’s also used by lots of users to contact a site owner regarding a business opportunity or to propose a link exchange between sites. There are many uses for a form button on websites. These are just some of the more commonly used ones.
Unless your site already has its structure completed. It’s likely that you’ll either need to add your form button to a new section toward the bottom of your site or you’ll need to add it to a footer.
Ensure you’re in your page editor and the page you intend to edit.
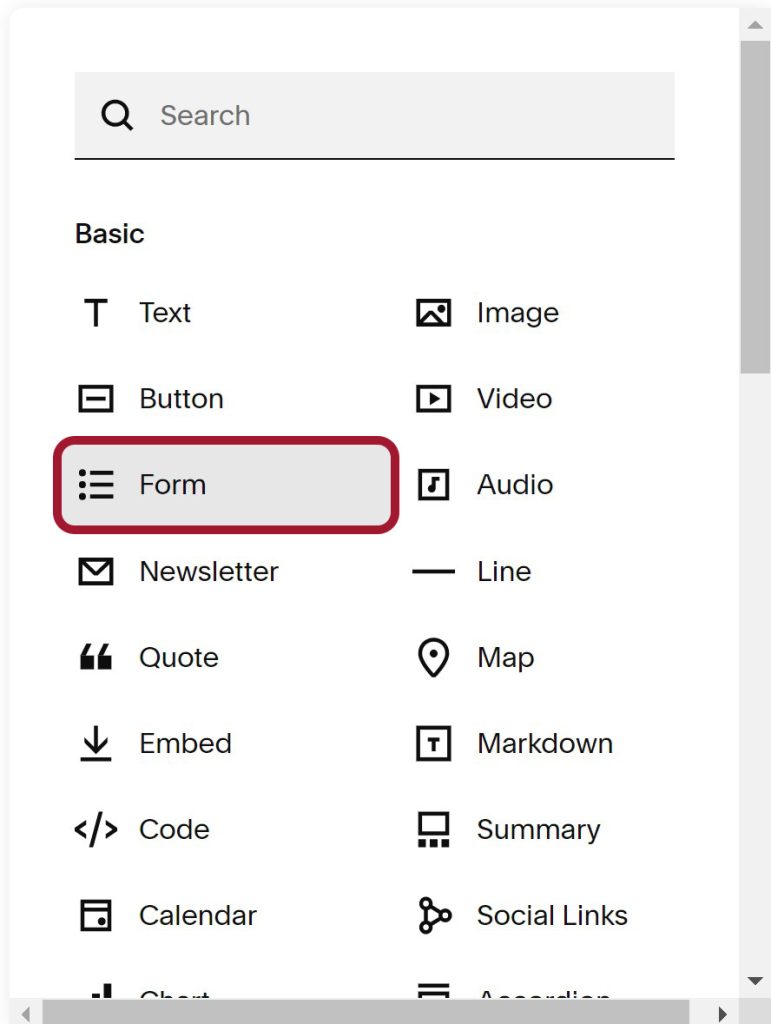
- Start creating your new section by clicking “Add section”. You’ll see this as one of your editor’s many blue horizontal bars.

- Next, select “Add Block” in your new section or your footer if you plan to place the form there. Choose “Form” in the “Add Block” pop-up window.
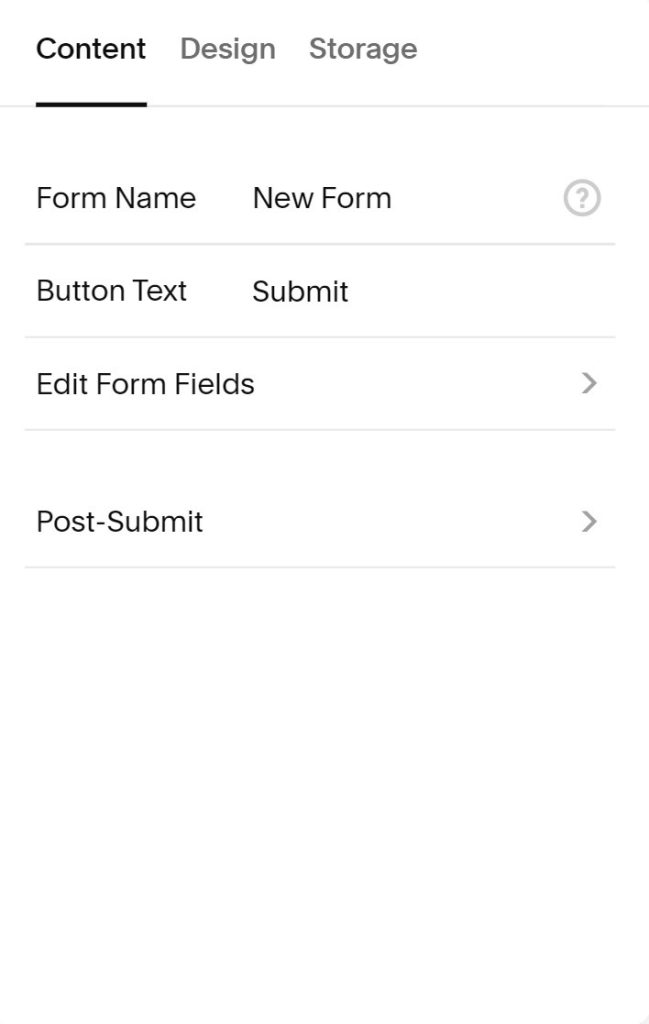

As with the newsletter buttons, you are offered alternative storage locations to store users’ details securely. It’s worth noting you’ll need to adhere to GDPR laws while possessing information that has been trusted with you by the user.
Pinterest has always been a fantastic platform for sharing content of all types. Squarespace offers native support to share content from any Squarespace platform to Pinterest with ease, as long as the site owner has added the ability for users to do this.
They’re very easy to enable and will appear on appropriate images when hovered over by the user.
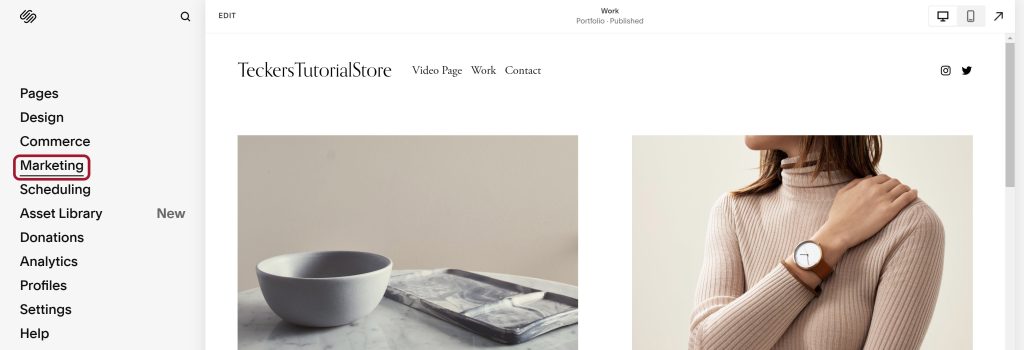
- Start by going to your Squarespace dashboard and selecting “Marketing“.
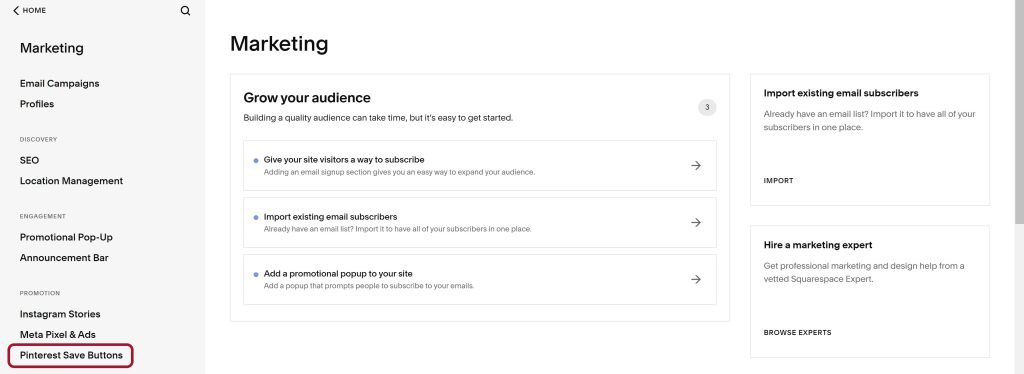
- On the next page, select “Pinterest save buttons“.
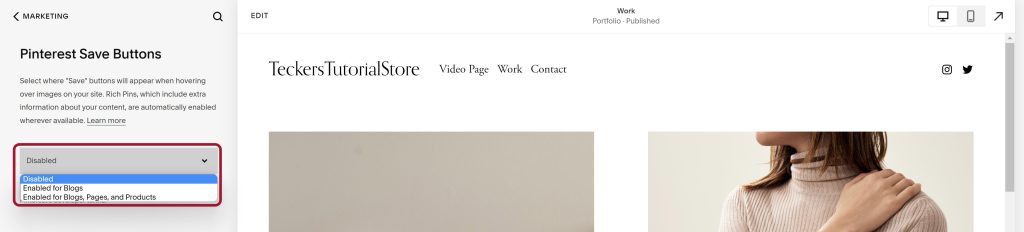
- You should now be on the “Pinterest Save Buttons” page. All you need to do from here is select the drop-down button on the left of the page editor and change it from “Disabled” to either “Enabled for Blogs” or “Enabled for Blogs, Pages and Products”.
Summary
Knowing how to use buttons correctly in Squarespace or just while website building is really important. They’re definitely not hard to use once you learn the ins & outs, but knowing which button to add and where can really help to ensure your website is well-structured and rounded.
If you want to learn more about the Squarespace platform, feel free to look at more of our Squarespace tutorials when you have the time, and you’ll be an expert site builder on Squarespace in no time.